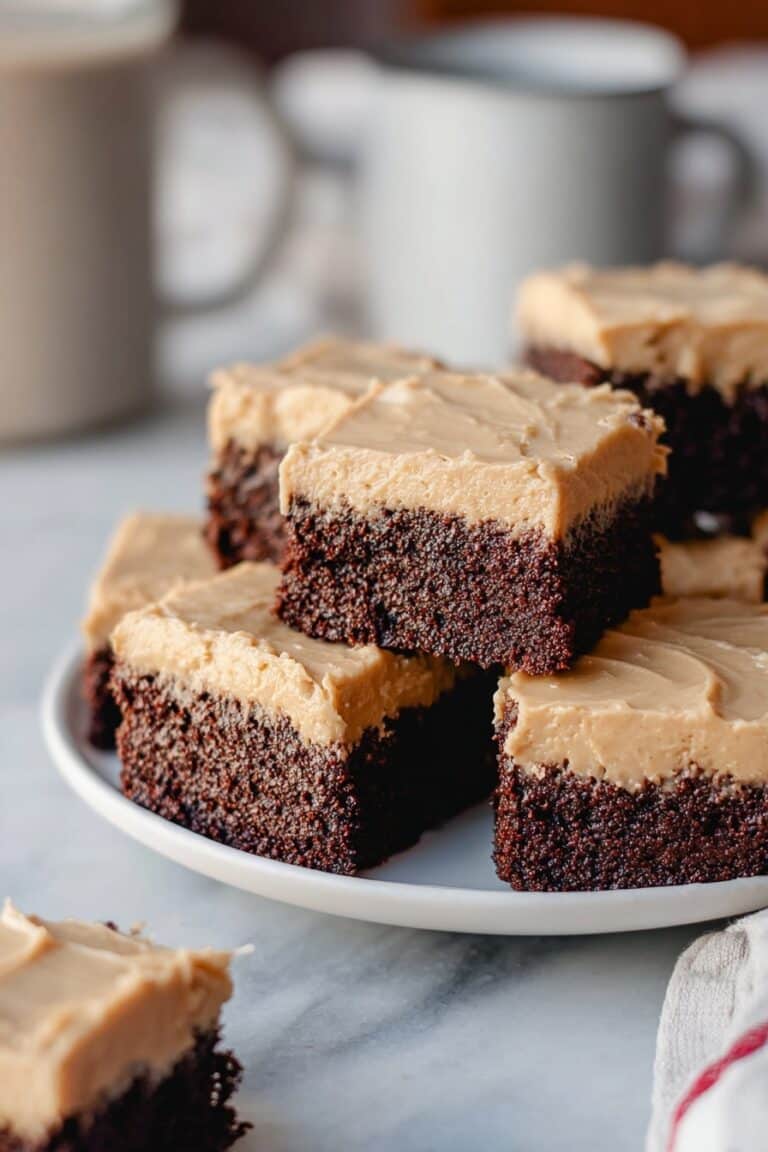
If you’re craving a nostalgic, comforting treat that’s as easy to make as it is delicious, you’re in for a real delight with this Lunch Lady Peanut Butter Bars Recipe. These bars bring back those school lunch vibes with a perfect balance of peanut buttery richness and a sweet, melt-in-your-mouth texture that everyone will love.
Why You Should Make This Recipe
Super simple ingredients: No fancy pantry runs needed—this recipe uses staples you likely already have on hand.
Quick and fuss-free: Prep and bake in under 30 minutes, leaving you with more time to enjoy these bars.
Perfect texture combo: Silky peanut butter meets a crisp, crumbly base for a satisfying bite.
Kid-friendly and nostalgic: It’s a throwback bar that’s just as loved by kids today as it was back in the lunchroom days.

Ingredients & Substitutions
The magic behind the Lunch Lady Peanut Butter Bars Recipe lies in its simplicity—each ingredient plays a pivotal role: from creating the chewy base to enriching the flavor and giving that iconic peanut butter taste.

- Peanut Butter: The star of the show—smooth or crunchy works, but smooth gives a silkier texture.
- Sugar: Granulated sugar adds the perfect hint of sweetness; brown sugar can be swapped for a deeper caramel note.
- Butter: Gives moisture and richness; using salted butter can add a nice contrast but adjust the salt accordingly.
- Flour: The structure provider—bleached or unbleached all-purpose flour both work great.
- Vanilla Extract: A splash enhances the peanut butter flavor and brings warm, aromatic depth.
How to Make Lunch Lady Peanut Butter Bars Recipe
Step 1: Mix the Base Ingredients
Start by creaming together softened butter, peanut butter, and sugar until the mixture is smooth and creamy. This base is where the magic begins, so take your time to get it perfectly combined—the sugar should start to dissolve into the fats, creating a luscious batter.
Step 2: Incorporate the Flour and Vanilla
Once your peanut butter mixture is creamy, gently fold in the flour and the vanilla extract. This step forms the dough-like batter which will hold the bars together with just the right crumbly texture—not too dry, but just enough bite.
Step 3: Press and Bake
Press the batter evenly into a greased or parchment-lined baking pan. Make sure it’s packed down well so that it bakes into a firm bar instead of crumbly bits. Bake until the edges are golden and the centers have set—your kitchen will start to smell heavenly!
How to Serve Lunch Lady Peanut Butter Bars Recipe

Garnishes
For an extra-special touch, sprinkle a pinch of flaky sea salt on top right after baking to enhance the peanut butter’s natural saltiness. A drizzle of melted chocolate or a dusting of powdered sugar can also add visual appeal and complementary flavors.
Side Dishes
These bars pair wonderfully with a cold glass of milk, a scoop of vanilla ice cream, or even alongside fresh fruit for a balanced, scrumptious snack. They’re versatile enough to enjoy anytime, anywhere.
Creative Ways to Present
Cut the bars into fun shapes using cookie cutters for kid-friendly parties or stack squares on a decorative platter with layers of colorful napkins underneath. You can also serve them with a side of whipped cream and toasted nuts for a café-style treat at home.
Make Ahead and Storage
Storing Leftovers
Keep your peanut butter bars fresh by storing leftovers in an airtight container at room temperature for up to 3 days. This helps maintain their soft but firm texture without drying out or becoming too crumbly.
Freezing
These bars freeze beautifully! Wrap individual squares tightly in plastic wrap and place them in a freezer-safe bag for up to 3 months. Just thaw at room temperature before enjoying for that freshly baked feel.
Reheating
If you’d like to warm them up, pop a bar in the microwave for 10-15 seconds—it softly revives the peanut butter goodness without making them soggy or too hot.
FAQs
-
Can I use natural peanut butter for this recipe?
Yes! Natural peanut butter works well, though it may affect the texture slightly because it’s less oily and more prone to separating. Stir it well before measuring, and your bars will still be deliciously peanutty.
-
What’s the best way to cut these bars without crumbling?
For clean cuts, let the bars cool completely before slicing. Using a sharp knife dipped in hot water and wiped dry helps make smooth cuts with minimal crumbling.
-
Are these bars gluten-free?
This recipe calls for all-purpose flour, which contains gluten. You can experiment with gluten-free flour blends, but results may vary in texture and firmness.
-
Can I add mix-ins like chocolate chips or nuts?
Absolutely! Stirring in chocolate chips, chopped nuts, or even a sprinkle of toffee bits can add extra flavor and crunch, making the bars even more indulgent.
Final Thoughts
I can’t recommend the Lunch Lady Peanut Butter Bars Recipe enough—it’s a perfect blend of simplicity and childhood nostalgia that never fails to bring smiles. Give it a try and watch these irresistible bars become your new go-to treat for snacking, dessert, or anytime you need a peanut butter pick-me-up!
Print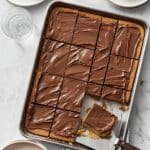
Lunch Lady Peanut Butter Bars Recipe
- Prep Time: 15 minutes
- Cook Time: 10 minutes
- Total Time: 2 hours 25 minutes
- Yield: 16 bars 1x
- Category: Dessert
- Method: No-Cook
- Cuisine: American
- Diet: Vegetarian
Description
These Lunch Lady Peanut Butter Bars are a deliciously rich and chewy treat combining creamy peanut butter with crisped rice cereal and a sweet chocolate topping. Perfect for an easy homemade snack or dessert, these no-bake bars are simple to prepare and loved by peanut butter fans of all ages.
Ingredients
Base
- 1 cup peanut butter (creamy or crunchy)
- 1/2 cup unsalted butter
- 1/2 cup granulated sugar
- 1/2 cup brown sugar, packed
- 1 teaspoon vanilla extract
- 3 cups crisped rice cereal
Chocolate Topping
- 1 1/2 cups semi-sweet chocolate chips
- 2 tablespoons peanut butter
Instructions
- Prepare the base mixture: In a medium saucepan over low heat, melt together the peanut butter, unsalted butter, granulated sugar, and brown sugar. Stir constantly until the mixture is smooth and all sugars are dissolved. Remove from heat and stir in vanilla extract.
- Add the cereal: Pour the crisped rice cereal into the peanut butter mixture and gently fold until all cereal pieces are evenly coated with the mixture.
- Press into pan: Line an 8×8-inch baking pan with parchment paper or lightly grease. Transfer the peanut butter-cereal mixture into the pan and press firmly and evenly with a spatula or the bottom of a glass to create an even layer.
- Make the chocolate topping: In a microwave-safe bowl, combine the semi-sweet chocolate chips and 2 tablespoons of peanut butter. Microwave in 30-second intervals, stirring well after each, until the mixture is fully melted and smooth.
- Spread the topping: Pour the melted chocolate and peanut butter mixture evenly over the pressed base. Use a spatula to spread it into an even layer.
- Chill to set: Refrigerate the assembled bars for at least 2 hours, or until the chocolate topping is firm.
- Cut and serve: Once set, lift the bars out of the pan using the parchment paper edges. Cut into square bars and serve. Store leftovers in an airtight container in the refrigerator for up to one week.
Notes
- For a crunchier texture, use crunchy peanut butter instead of creamy.
- You can add chopped peanuts or chocolate chips inside the base mixture for extra texture.
- Ensure the peanut butter and butter are fully melted for a smooth mix.
- If bars become too hard after refrigeration, let them sit at room temperature for 10 minutes before serving.
- These bars freeze well; wrap individually and freeze for up to 2 months.

Kingjl is new to me, but the interface is user-friendly. Exploring the betting options now, and it seems promising so far. A good website to start your journey kingjl.
I looked at 98betwim. Very smooth site, I spent a solid amount of time there, a few hours, not bad. I especially enjoyed the sportsbook and placed a few bets. Nice site for everyone to check out at 98betwim.
Just tried kkkbetapp, and gotta say, not bad at all! The interface is slick and it’s super easy to find what you’re looking for. Definitely worth checking out! You can find it here kkkbetapp
Yo, been usin’ ku11net for a while now, and gotta say, it’s pretty solid. Easy to navigate and the games are decent. Check it out if you’re lookin’ for somethin’ new! Click here: ku11net
SSS Gaming é show! Tem uns jogos bem legais pra passar o tempo e ver se a sorte tá do nosso lado. sss gaming
Need betting odds and livescores for Macau? 7m.cn keo ma cao gives you both in one place! It’s saved me so much time and helped me win a few extra bucks. Definitely recommend: 7m.cn keo ma cao
Автоматизация продвижения возможна благодаря прогоны xrumer, но важно правильно их настраивать.