Description
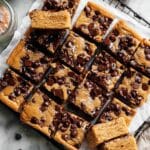
These Brown Butter Chocolate Chip Bars are soft, gooey, and irresistibly addictive. Featuring nutty browned butter folded into a classic chocolate chip cookie batter, they bake up into rich, chewy bars with a golden crust and melty chocolate chips throughout. Finished with flaky sea salt to enhance the chocolatey sweetness, these bars are perfect for a comforting treat or dessert.
Ingredients
Scale
Brown Butter
- 1/2 cup (110g) + 1 tbsp unsalted butter*
Dry Ingredients
- 1 1/4 cups (165g) all purpose flour
- 1/2 tsp baking powder
- 3/4 tsp kosher salt
Sugars
- 1/2 cup (100g) dark brown sugar, packed
- 1/4 cup (50g) granulated sugar
Wet Ingredients
- 1 large egg
- 1 1/2 tsp vanilla extract
Chocolate
- 1 cup (185g) semisweet chocolate chips, plus more for sprinkling on top
Finishing Touch
- Flaky sea salt, for sprinkling
Instructions
- Brown the Butter: Add 1/2 cup of unsalted butter to a saucepan over medium heat. Stir continuously as it melts and bubbles, watching carefully as it transitions from frothy to a golden amber color with a nutty aroma. Remove from heat and pour into a measuring cup.
- Adjust Butter Quantity: Immediately add the additional 1 tablespoon of butter to the warm melted butter to total exactly 1/2 cup. Transfer to the refrigerator to cool while preparing other ingredients.
- Preheat and Prepare Pan: Preheat the oven to 350°F (175°C). Grease and line an 8×8 inch square baking dish with parchment paper, allowing excess to hang over the edges for easy removal later.
- Mix Dry Ingredients: In a small bowl, whisk together the all-purpose flour, baking powder, and kosher salt until combined.
- Combine Sugars and Browned Butter: In a large mixing bowl, whisk the dark brown sugar, granulated sugar, and the cooled browned butter together until smooth and combined.
- Add Egg and Vanilla: Whisk in the vanilla extract and the large egg until the mixture is smooth and homogenous.
- Incorporate Dry Ingredients and Chocolate Chips: Using a rubber spatula, gently fold the flour mixture into the wet ingredients. When you still see some flour, fold in the semisweet chocolate chips carefully to evenly distribute.
- Transfer to Pan and Add Toppings: Spread the batter evenly into the prepared baking pan. Sprinkle extra chocolate chips over the surface and gently press them into the batter.
- Bake: Bake the bars in the preheated oven for 25 to 30 minutes, or until the edges turn a very light golden brown and the center is puffed and set but still soft.
- Finish with Sea Salt: Immediately after removing from the oven, sprinkle a couple pinches of flaky sea salt over the warm bars to enhance flavor.
- Cool and Slice: Allow the bars to cool in the pan at room temperature for approximately 45 minutes, or refrigerate to speed up cooling. Once cooled but slightly warm, lift the bars out using the parchment paper overhang and cut into 16 squares.
Notes
- Be attentive when browning butter to prevent burning; remove from heat as soon as it turns a golden amber color with a nutty aroma.
- The exact amount of butter in the browned mixture should be 1/2 cup; adjust with a bit more or less butter as needed.
- Using parchment paper with overhang makes it easier to lift the baked bars out for slicing.
- Sprinkling flaky sea salt on top balances sweetness and enhances chocolate flavor.
- Bars can be stored in an airtight container at room temperature for up to 3 days or refrigerated for up to a week.
- Allow bars to cool sufficiently before slicing to achieve clean cuts.